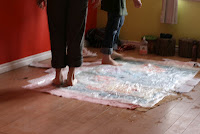
Sunday was a day for wet felting. All daycare toys and furniture came out of the big red room and were replaced with felters and wool. It was a day for creative play and play we did. We started with a small meditation and then got right into the felting process. Everyone agreed that the soft wool is a pleasure to work with and gives a feeling of healing and comfort.

Special Guests
My special guests were Jordan and Brian which you can see in the pic to the left working in tandem on their art piece. You might remember the couple from Project Priceless who got married last year by relying on donations from local crafters and businesses. Their experiment was a great success and now that the big wedding day has gone by they have launched a new blog entitled The Nest.
I have a soft spot for this couple. They are so sweet and I love how they create opportunities for themselves in creative ways. If you read their blog you will find honesty and a love to support local crafters and businesses. What is there not to like? In the next week or so you should be able to read up their take on the workshop.
Is the process of using raw wool, hot water, soap and friction to make a piece of felt. This technique has been used for centuries. For example nomads in Mongolia felt their yurt roofs and walls out of felt pieces. This technique lends itself to many beautiful results from wall hangings, 3 dimensional structures such as vases, boxes, play houses, to coats, hats, playmats and so much more.
 Step 1
Layer your backround first starting with white which becomes your canvas. Then layer your background colours as you can see Sue doing to the right. You have to make sure that layers are thick so not to have holes in your project later on.
Step 2

 Now it's the fun part, creating your design.Choose your colours of choice and place them on your white wool canvas with shapes, forms, lines, and swirls. Let your imagination take you. Whether you came to the project with an image in mind allow the creative process to deviate and stay open to whatever else might manifest. Have fun with colour and add lots of contrast colours.
Step 3
Squirt work with hot piping water and lots of soap. I use a dish soap bottle for this. Notice how the wool becomes squished down and changes. It is a time of letting go and allowing the project to take a life of it's own.
Step 4Put bubble wrap over soaked art piece and begin, pressing on it with hands, feet and even use a rolling pin to squish it down. It is this friction that starts binding the wool together. Check your work on a regular basis so that your fibers don't move around too much. In the beginning before your work is not too felted you place stray wool back in it's place. Once you've notice that your fibers have started to bind you roll the whole thing up in a huge sausage and start rolling back and forth. This is where the hard earned work of wet felting begins. It is hard work!
Look at Jordan and Brian's finished piece.
Once you get the consistency of the fibers that you want. A good way to know if you are finished is with the pinch test. If you can grab some fibers and lift them up you need to do more felting if the fibers stay together you are done. Sometimes I cheat near the very end by putting my work in the washing machine but beware it can shrink fast. Keep a very close eye on it as it tumbles in your appliance or you might just cry for all that hard work lost!


1 comment:
make it shorter,
love tony
Post a Comment